Antigravity
Use the HTFlow MCP server with Antigravity's remote MCP setup.
Endpoint
Config path
Setup guide
Connect Antigravity to HTFlow
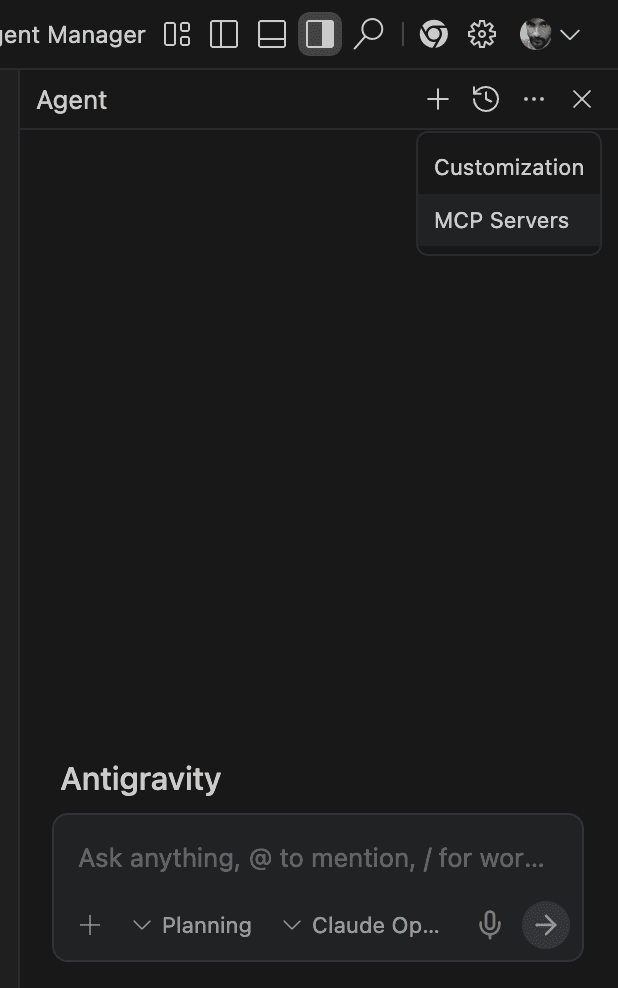
Open Antigravity and click the three-dot menu (···) at the top of the Agent panel. Select "MCP Servers" from the dropdown.
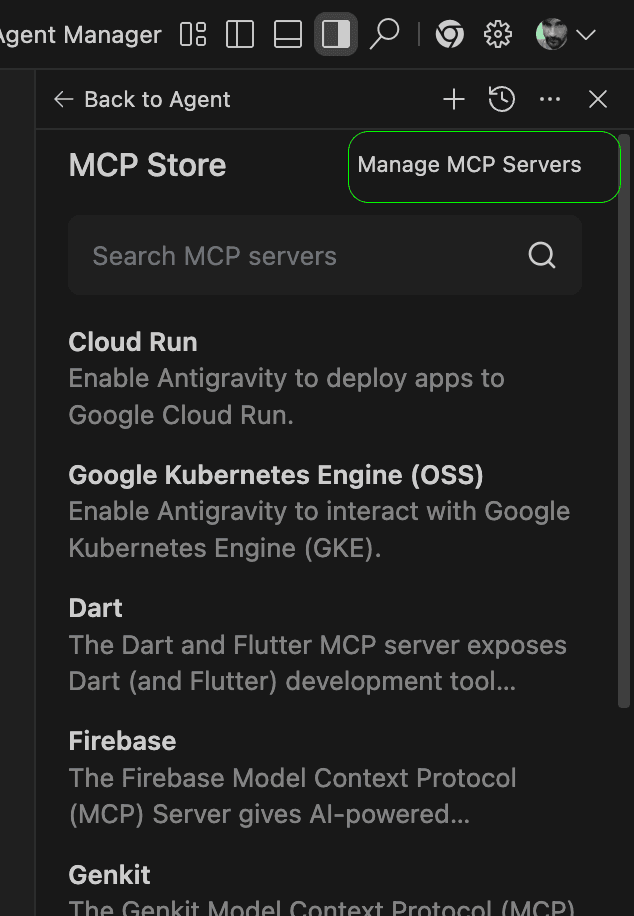
This opens the MCP Store. Click the "Manage MCP Servers" button in the top-right corner to open the MCP configuration where you can add a custom server.
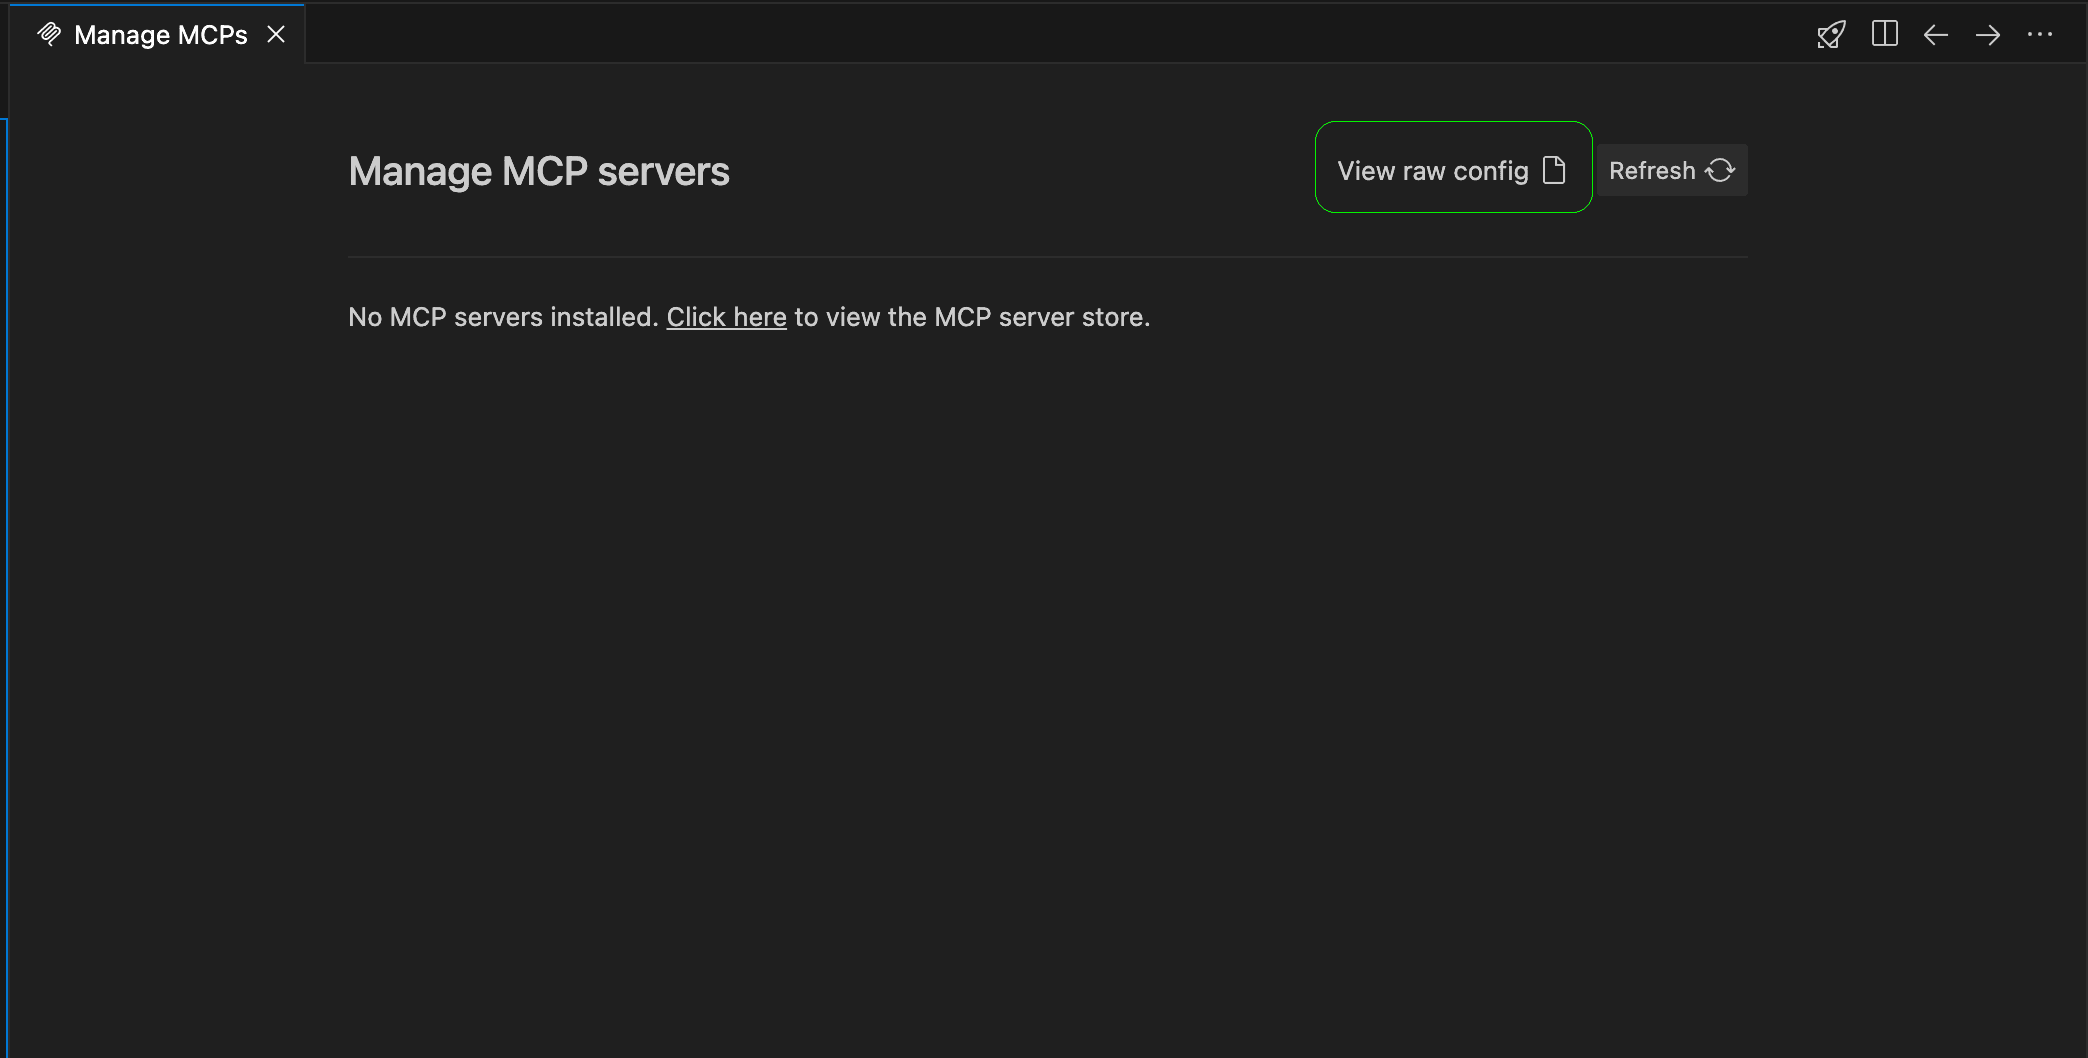
This opens the "Manage MCP servers" page. Click "View raw config" to open the raw JSON configuration file where you can add the HTFlow MCP server.
This opens the mcp_config.json file at ~/.gemini/antigravity/mcp_config.json. Paste the config below and replace YOUR_TOKEN with your real HTFlow API token. Antigravity uses serverUrl instead of url.
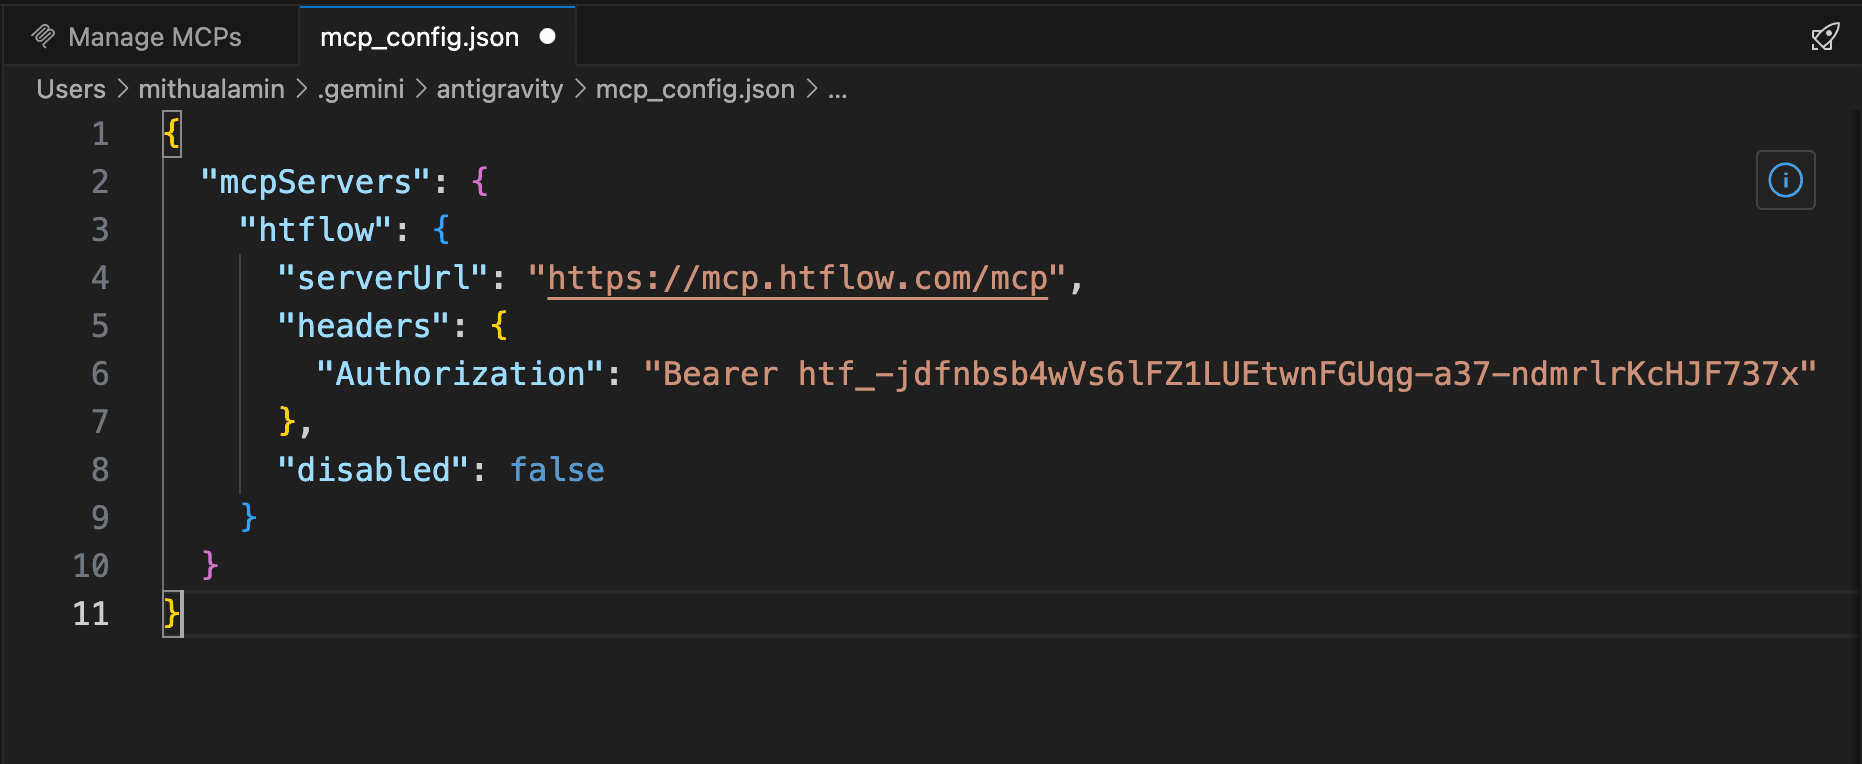
{
  "mcpServers": {
    "htflow": {
      "serverUrl": "https://mcp.htflow.com/mcp",
      "headers": {
        "Authorization": "Bearer YOUR_TOKEN"
      }
    }
  }
}Save the config and restart Antigravity. You can now ask the agent to generate a full website through HTFlow MCP.
Client notes
- • Antigravity uses serverUrl instead of url.
Config snippet
{
  "mcpServers": {
    "htflow": {
      "serverUrl": "https://mcp.htflow.com/mcp",
      "headers": {
        "Authorization": "Bearer YOUR_TOKEN"
      }
    }
  }
}